//This c++ code is generated by PictoBlox
//Gloabl Variables are declared here
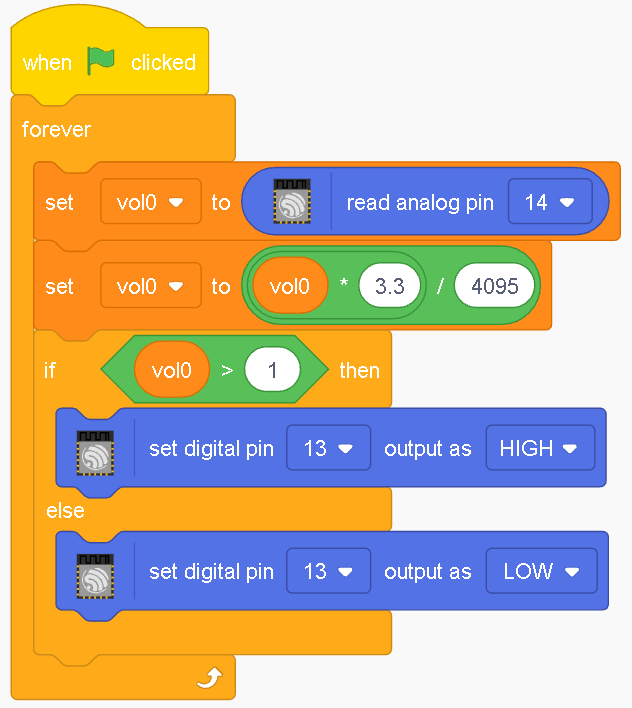
float volt0;
float volt;
void setup() {
//put your setup code here, to run once:
pinMode(14, INPUT);
pinMode(13, OUTPUT);
}
void loop() {
//put your main code here, to run repeatedly:
volt0 = analogRead(14);
volt = (volt0 * (3.3 / 4095));
if((volt > 1)) {
digitalWrite(13, true);
}
else {
digitalWrite(13, false);
}
}
/*

LESSON A-4  20231210_LessonA_4_ESP32.ino

1)  ESP32で電圧を計ってみよう。

2)  電圧の値を表示しよう。

3)  電圧の値をグラフで見てみよう。

4)  14ピンに電圧をかけて、その値を表示する。

5)  14ピンにある大きさ(1V)以上の電圧がかかったら、13番ピンに接続したLEDを点灯させる。

*/

 int x; //14ピンに入力された値

 float volt; //xを電圧に変換した値。実際の電圧(ボルト)になる。

void setup() {

  Serial.begin(115200);

  pinMode(13, OUTPUT); //LEDを13番ピンに接続

}

void loop() {

  // 14ピンの値を読む

  x = analogRead(14);

  delay(20);//serial plotterでチャタリングのような現象があるので、delay()を入れている。

  // 0から3.3Vの電圧が0から4095の値になっているので、値をボルトに変換する。

  volt = x * (3.3 / 4095.0);

  // 電位の大きさを表示する。

  Serial.println(volt);

  if (volt>=1){

    digitalWrite(13,HIGH);//13番ピンON

  }

  if (volt<1){

    digitalWrite(13,LOW);//13番ピンOFF

  }

}