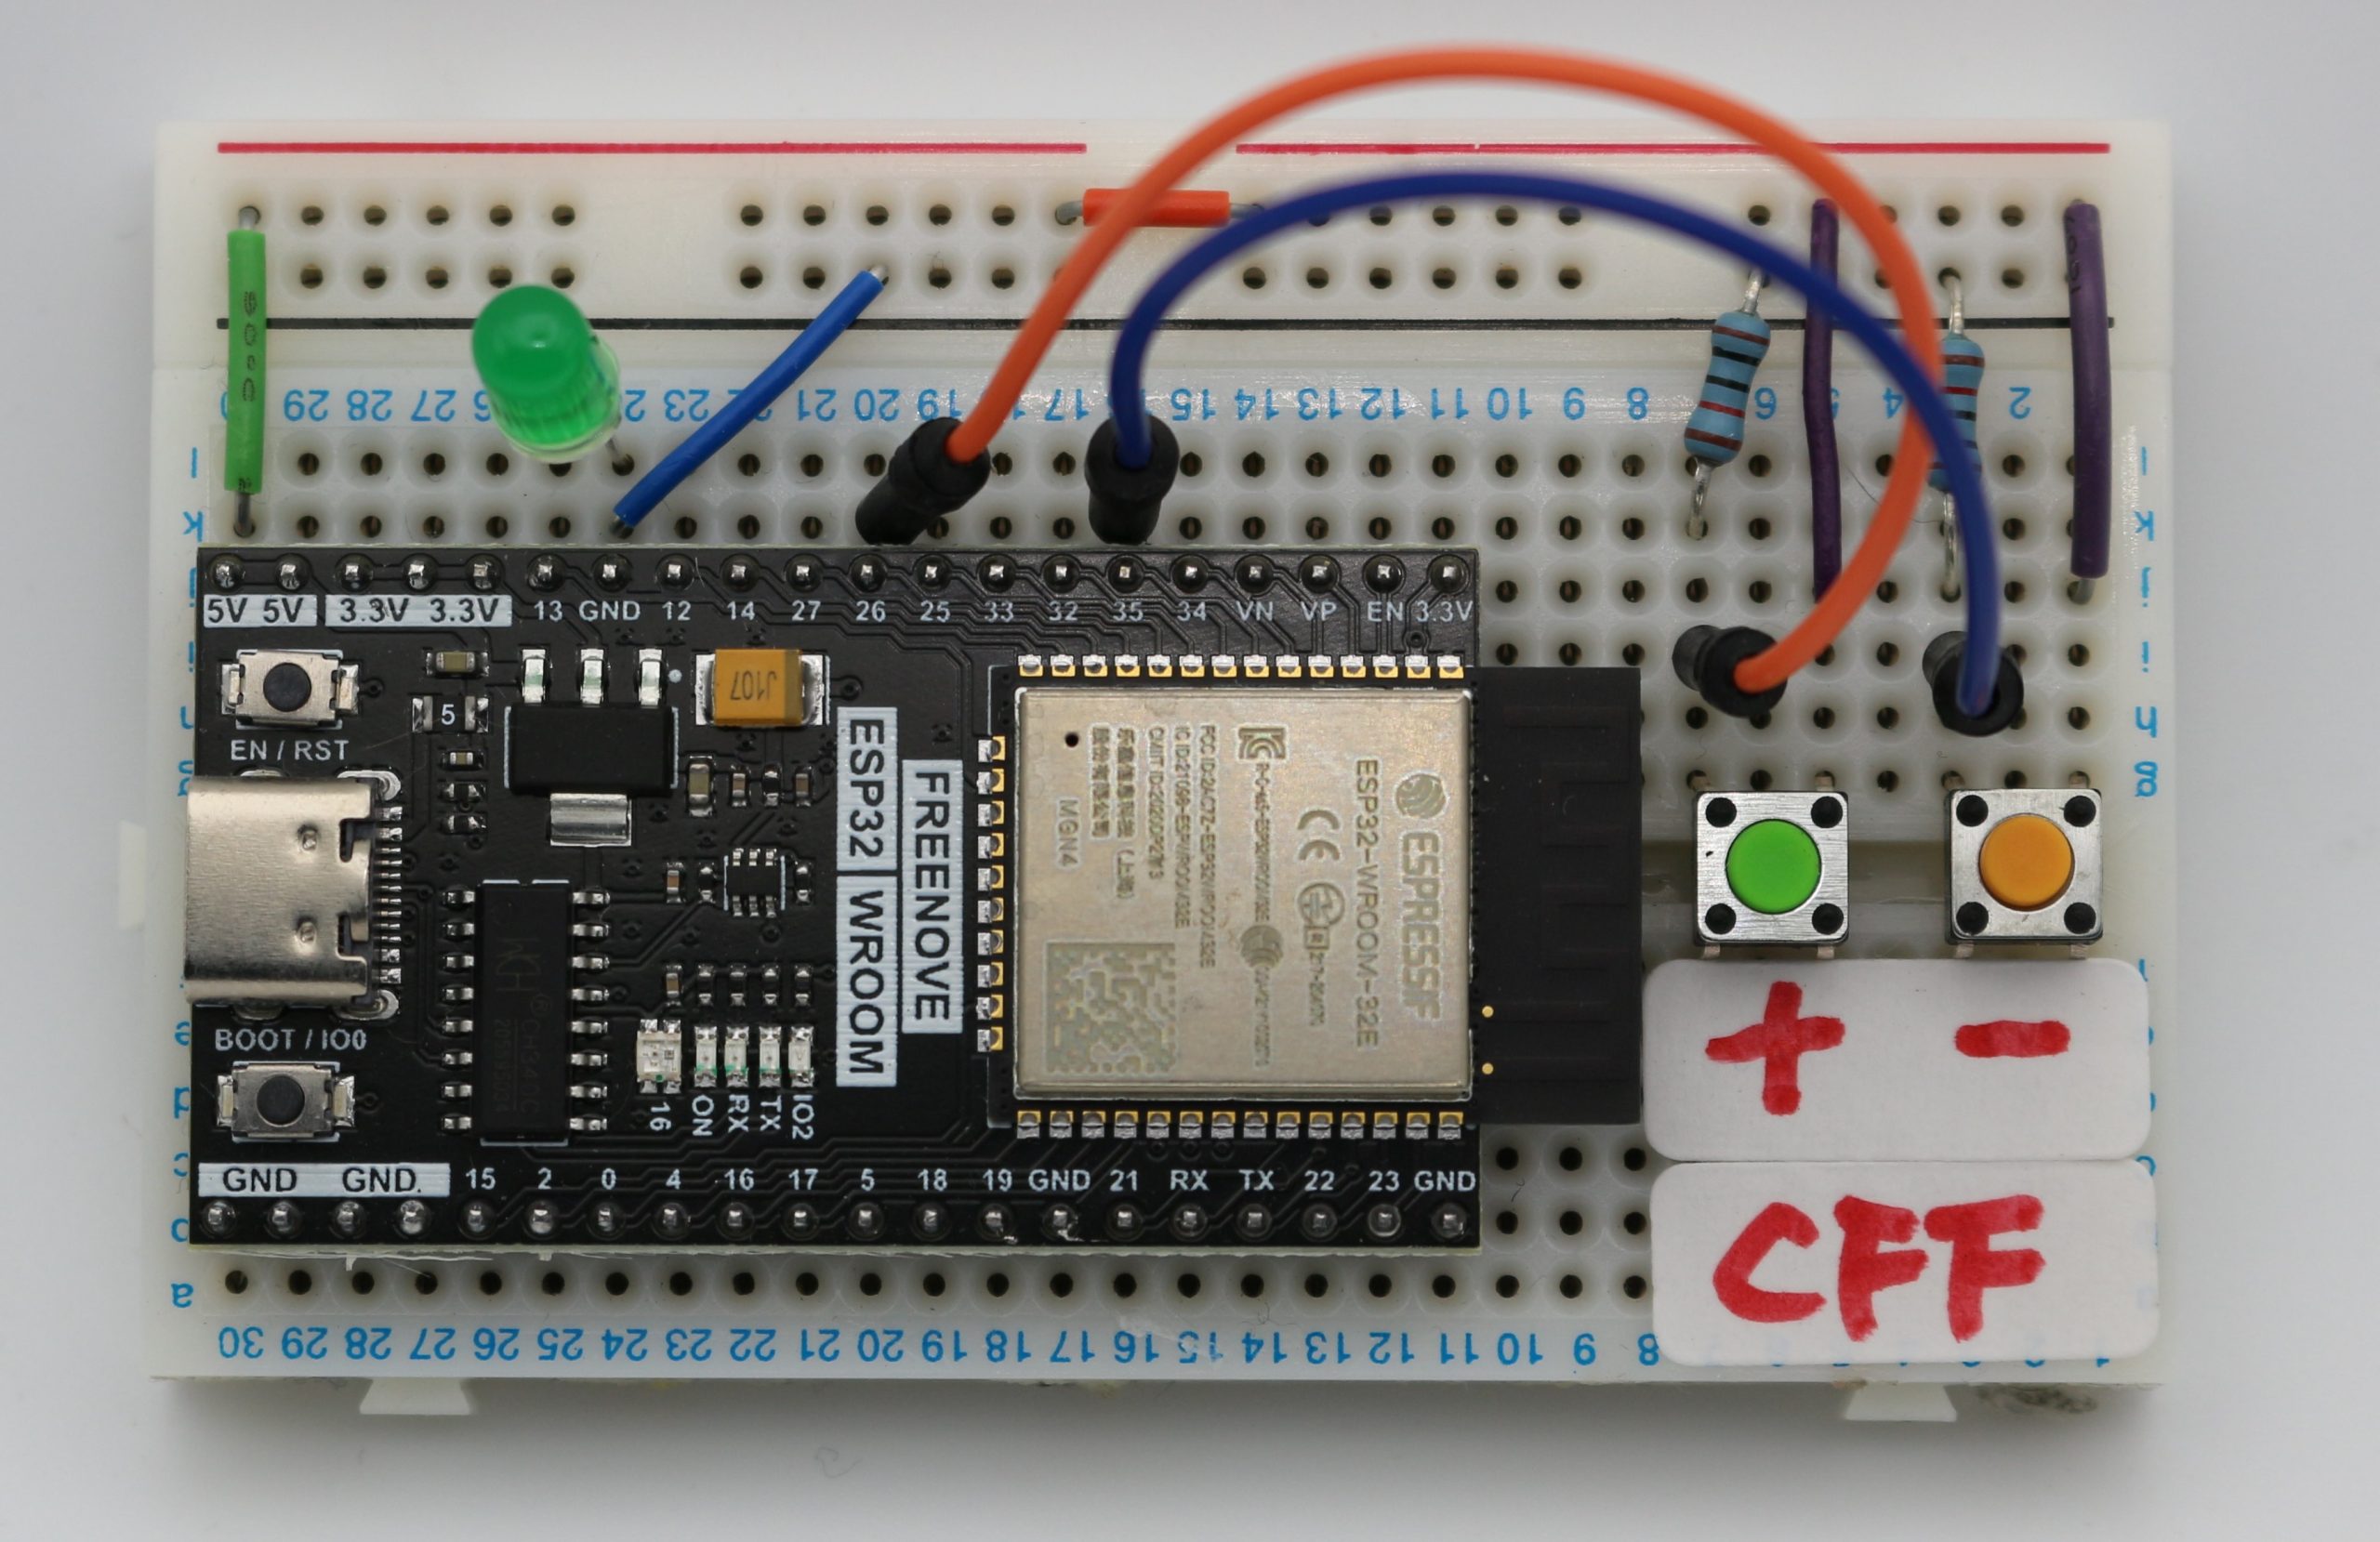
頻度を上げるボタン(タクトスイッチ)と下げるボタンの2つが準備されています。
ボタンは、10kΩの抵抗でプルダウンしているので、スイッチがオフのときは、グランド接地になっています。スイッチがオンで5Vになります。スイッチ用には、28番と35番ピンをつかっています。28番ピンにつながたスイッチを押す(オン)と頻度はあがり、35番ピンにつながったピンを押すと頻度は下がります。
LEDは、13番ピンに接続しています。
頻度は、Arduino IDEのシリアルモニターで確認することができます。
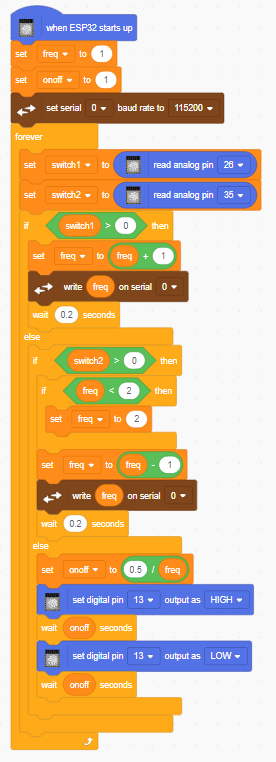
PictoBlox Code Download
PictoBlox Code拡大
//This c++ code is generated by PictoBlox

//Gloabl Variables are declared here
float freq;
float onoff;
float switch1;
float switch2;

void setup() {
	//put your setup code here, to run once:
	Serial.begin(115200);
	pinMode(26, INPUT);
	pinMode(35, INPUT);
	pinMode(13, OUTPUT);


	freq = 1;
	onoff = 1;
}

void loop() {
	//put your main code here, to run repeatedly:


	switch1 = analogRead(26);
	switch2 = analogRead(35);
	if((switch1 > 0)) {
		freq = (freq + 1);
		Serial.println(freq);
		delay(0.2 * 1000);
	}
	else {
		if((switch2 > 0)) {
			if((freq < 2)) {
				freq = 2;
			}
			freq = (freq - 1);
			Serial.println(freq);
			delay(0.2 * 1000);
		}
		else {
			onoff = (0.5 / freq);
			digitalWrite(13, true);
			delay(onoff * 1000);
			digitalWrite(13, false);
			delay(onoff * 1000);
		}
	}
}